|
We all know the importance of clipping path when it is about Amazon FBA Business. In this post, I am going to share with you some tips that can help you to grow your FBA Business.  Let’s go to deep without any more delay:
Zoom In Properly Without zoom in the picture, one cannot produce a perfect clipping path. So, my first tip is going to deep of your object. If you don’t zoom in the picture properly, there will be lost of edges after completing the selection. Consider this as your private task. Select with small Line Many people do hurry while creating path and perform with long line. That's why they need to regret later. To make it with the perfection one need to proceed with small line. Otherwise there is no way without regretting and start it again from the beginning. Starting from below Some editor starts selecting from the upper side, corner side or middle side. But none of these are the right way to approach at all. The best way to start creating path is the down side of the object. If you start from the down side, things become comfortable. Moreover, starting from the middle point can because you lose perfect shape. Keep File in PNG After performing your work, you should keep it in PNG. Don’t make the mistake to keep it in JPEG. The first thing is JPG doesn’t support transparent background. One the other hand with the PNG file format you can work with it later. One can also change the background anytime, when the file format in PNG. So, you should save it in PNG file type. If you want white background you can keep it in JPG but also keep a copy of PNG. So you can use it later when you need.
0 Comments
 Who wouldn't like to be a successful photographer? The greater part of the general population imagine that it is too difficult to even think about becoming a successful photographer. All things considered, it is significantly simpler than you might suspect. In any case, one has to know around eight key standards. Would you like to know those standards? How about we make plunge forward.
In case you are overseeing cloth related business, this post is especially for you. Do you appreciate what ghost mannequin is? If you haven't the foggiest, don't need to weight. You will perceive what ghost mannequin is and in what farthest point may you use this to develop your business. We should start. 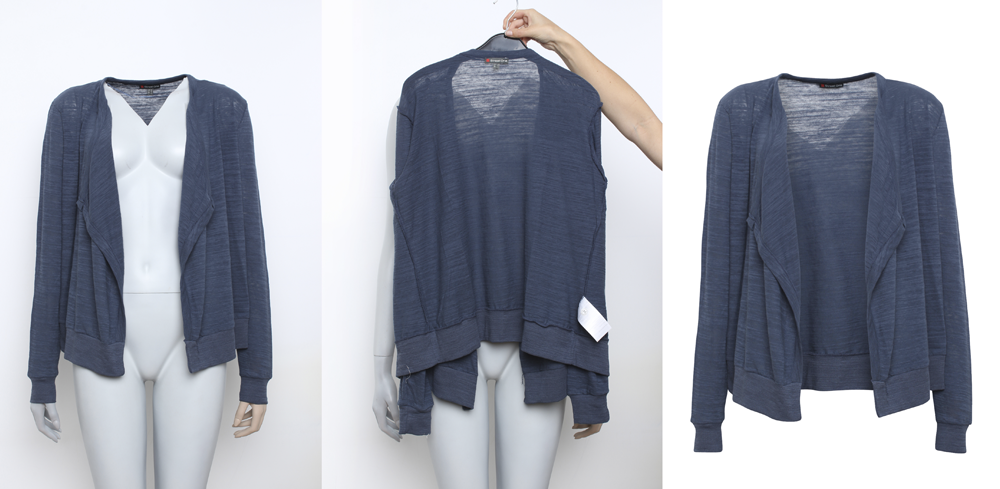 Photography is positively included with clothing business. You are willing for making once-over or you are expecting for movement whatever you wish you need photography. Especially, when your business is online based, you should put an exceptional obsession with your product photos. With everything considered, how you used to show your photos online? Do you using a mannequin to address your photo? In case your answer is indeed, this isn't the right technique to approach using any strategies. Viewers can getting occupied when you are appearing on mannequin. Any sorts of silly articles should not be used with product photos. That is an amazing standard of online business. One more thing is you are not seeming full view of your product. What is the game plan here? Using a ghost mannequin can be the best strategy now. As a matter of fact, ghost mannequin is the path toward giving clothing without mannequin the full view. It gives a ghostly look when you are exhibiting your product with no mannequin. That is the reason this effect called ghost mannequin. Empower me to familiarize the most straightforward course with have ghost mannequin sway. At first, get a photo of your clothing product with mannequin and open it in Photoshop. By then select your thing with Selection tool. Make another layer from the layer panel and void the background. By then open the back view of your product and open it. Crop the part that you have to merge and use the marquee tool now. By then paste it in the past layer. A little while later you may need to resize the back part. Use free change from the edit option to take off right improvement. By then resize it as showed up by the article and spot it magnificently. Use wrap option by tapping the right button, this option can help you with looking intensely natural. By then copy the path and make selection to relate most of the edges sensibly. After you guarantee that you have picked the parts that you need to cut the remainder of the parts. At any rate, in the meantime it won't look natural. You have to do some more destroy it. To play out this, go to decimate option and take a small size brush. By then reduce the hardness of the brush and fix those are that displaying merging edges. 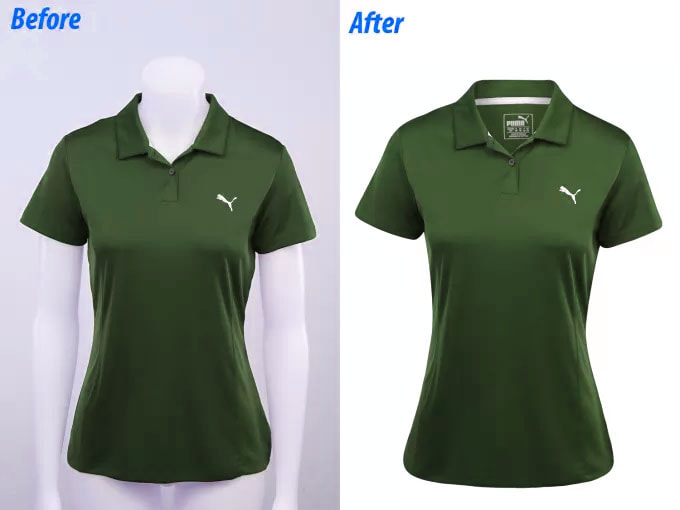 This is the last touch so play out this improvement by giving some time. Everything considered, don't attempt to complete a preposterous extent of basically keep the thing natural.
A responsibility of gratefulness is all together for exploring. 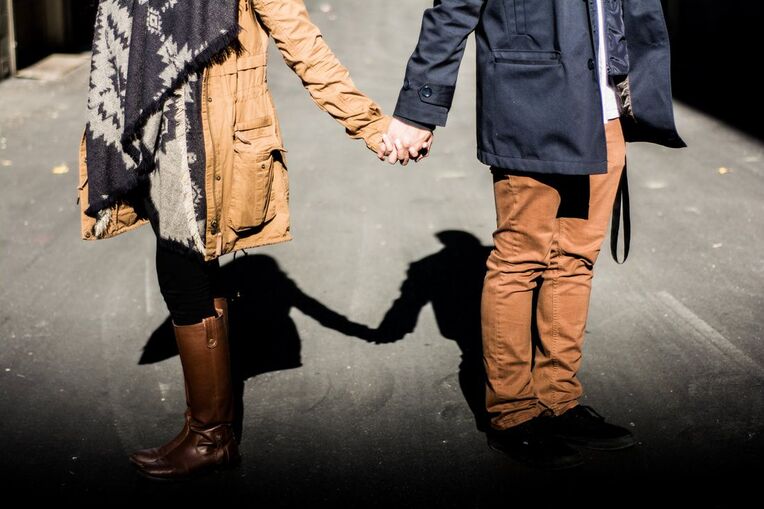 Drop shadow effect is getting more and more popular day by day. It is mostly use for product and jeweler photos. Do you want to learn this awesome image editing technique? In this post, I am going to familiarize with you the easiest way to create drop shadow in Photoshop.
At first open the image in Photoshop that you want to edit. At first, inspect is there enough space below your object to place shadow. If there is enough space then this is OK. If is not, put some extra background below your object with fill option. I want to remind you of an important thing. Don’t work with just one layer, it will not bring any good thing for your photo whatsoever. Adding more layer bring some realistic look in your photo. So, after you put the extra space, add a new layer and select your targeted object. Make a circle and place below your object and make it black. Now you need to reduce the opacity of the black color. You can do this in two ways. The first way that you can apply is to change it manually from the opacity option. Reduce it to 20%. Set the radiation to 85 pixels from Gaussian blur option. How is it looking now? It is not real enough. You need to do some extra effort to make it more realistic. Make a duplicate shadow of according to your object. Then make blur of each layer that you have created. Or you can convert them into smart objects. In this purpose, click on the right button and click on the convert to smart object. Then go to Gaussian Blur option and set the radius to 106 pixels. Reduce some of layer Radius Number and increase some of those depending on your picture. Then merge all the layers together and again place the shadow precisely. Mirroring a practical in Photoshop can be an intriguing and huge effect to use. Do you wish to get comfortable with the methodology of how accurately to mirror a practical in Photoshop? Experience this whole article circumspectly after that. In this post, you are presumably going to get comfortable with the most direct way to deal with do mirroring influence in Photoshop.  At first, open the picture in Photoshop you have to modify. Visit the measurement board and open the setting layer. To finish this errand, experience the lock image at the right. By then visit the image decision from the pick and over canvas measure elective. A trade compartment will come in your windows. Set the unit convictions to rate and finish off the esteem 100 in the width and check the tick on relative choice. Following this, press the enter key. You by then will found some extra space to focus on your image. You have space both in left and at this moment. At any rate the irritating issue here is, the space is past your image. You should fill the picture reliant on the space. Thus, head to see choice and pick suit to the screen. Today head to see elective eventually and select new guide. Pick the vertical choice from the talk pack and pick the position half. By then you will scan for a vertical line in the midst of the picture.  experience the move gadget from the most flawlessly awesome of the zone and still left your thing aside. Select thumbnail close by CTRL after that. You need to scramble toward assurance and pick change decision by then. You by then will find 8 spots adjoining of the picture. Detect your picture at the right side or left point of view. In essential words, place it at the contrary side where you intend to make the mirror. When you place it press the enter decision perfectly.
You are about done by and by, click on in vain out of pocket change from the Edit choice. Put your mouse point on your snap and picture the right catch sought after by flip vertical. That is the solace system to mirror an image in Photoshop. |
 RSS Feed
