|
Nowadays, online jewelry business is dominating E-commerce arena. Are you also associated with this field? Some people are generating lots of sales from this field. Let’s know about photo editing for online jewelry business so that, you can also dominate the field too. 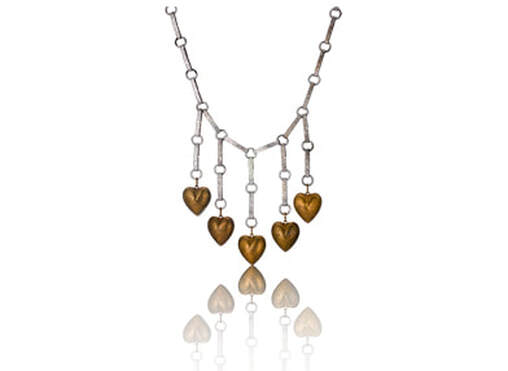 Today, you are about to identify three techniques that can help you to produce lots of sales. At the end of this article I will inform you how you can get these services.
By applying these photos altering technique in your online jewelry business you can make your jewelry photo mesmerizing that will drive thousands of customers. Without making any delay let’s move forward. Background Removal Service is the first one method of altering that you should apply in your merchandise photography. Basically, this is the process of deleting the background from where you have captured the photo. This technique is used for making an object more noticeable and attractive. Most importantly, it is a proven way to gather focus. That is must necessary to in any commercial area. It will help you to make your product look special from others. Before that it was tough to choose the right background. By applying this method you are able to capture your photo in any background. You don’t need to put stress of managing studio in a white background. So, it was the first mandatory things. With lots of competition in online approaching with this single method may not be sufficient enough. Allow me to introduce two more techniques that also should be included in your jewelry photo editing. The secondary method that you should apply is none other than photo retouching. It will make your jewelry photo way more interesting than the normal one. As camera is not mighty like our eyes it never delivers a realistic view in normal image. That’s the point where retouching comes into play. It is the final touch that makes a photo ready to publish. It is also can be said as mandatory for jewelry photo. But this work needs professional hand to look the item attractive and natural. The last technique that will give the photos a premium look is Shadow creation. This is another great photo altering technique. With this technique you can add different types of shadow like drop shadow, reflection shadow, natural shadow etc. It makes the jewelry product much more appealing. But where you get those services? Don’t need to find anywhere else. Clipping USA is offering all the mentioned photo editing services at a reasonable price. To get the service visit their site and click on get a Quote. CUSA takes less than one hour to response. If you want to check their quality first, free trial is offered for you. What’s the delay then? Grab it now.
3 Comments
Who doesn’t want to do multi masking? It is mainly used for hiding and revealing any precise part of an image. There are multiple ways to do masking in Photoshop. Very often, it becomes necessary to work with more than one portion. Do you know how to handle these types of editing? Let’s know in detail how to do multi masking in Photoshop. Allow me to show you with this image how can work with two or more masks in an image. 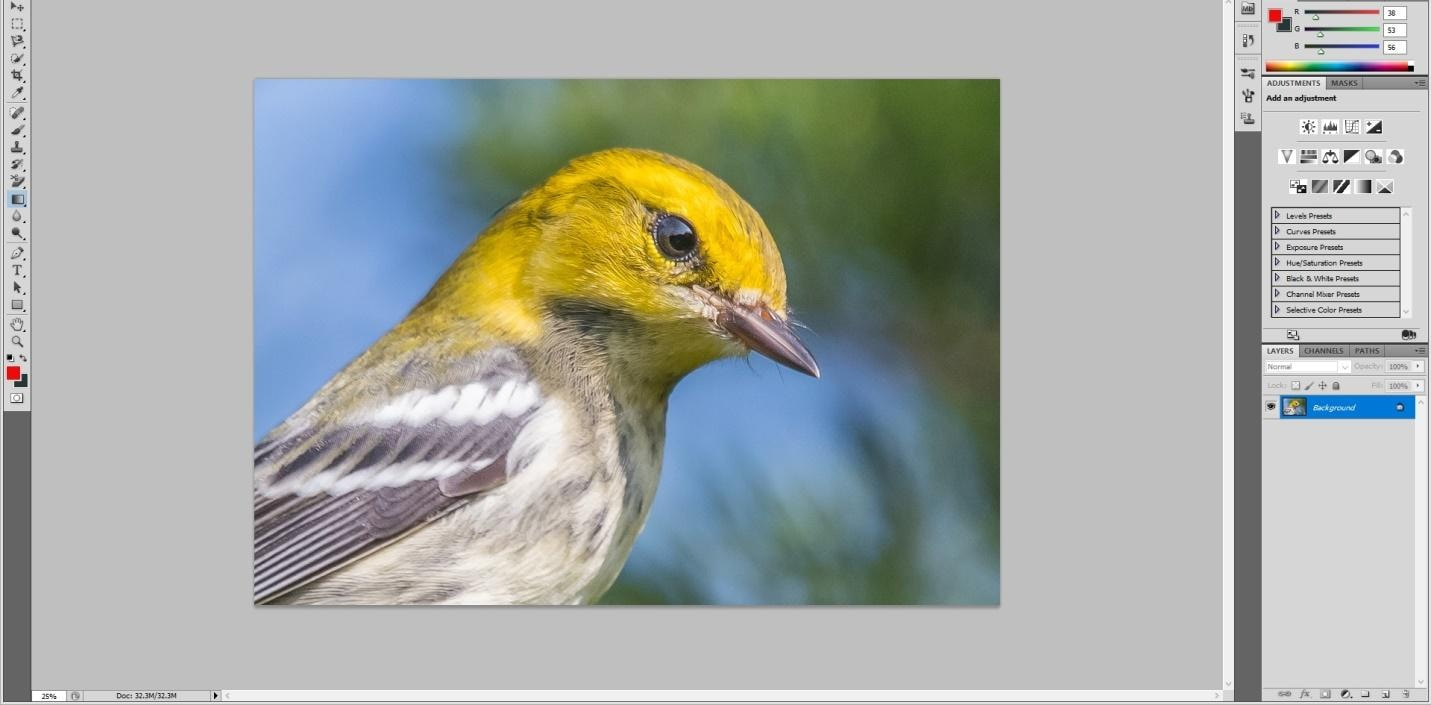 Suppose here I want to keep birds unchanged. Also willing to change the background and customize it with different effect. Firstly, make selection of the background with quick selection tool.  After making the selection, go to create a group from the below icon then create a mask from there. 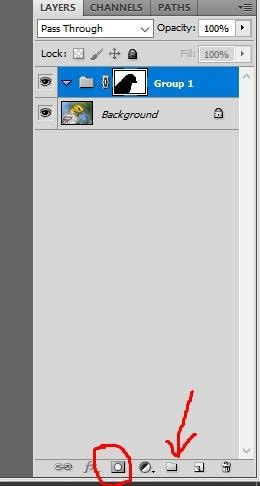 Now look at the Group icon only the background is selected here. If you perform any kind of editing stuff now that will only effect on the background. As we are going to work with multi mask so it’s better to rename it as “Background” for avoiding confusion. Let’s make some adjustments now with the background layer. 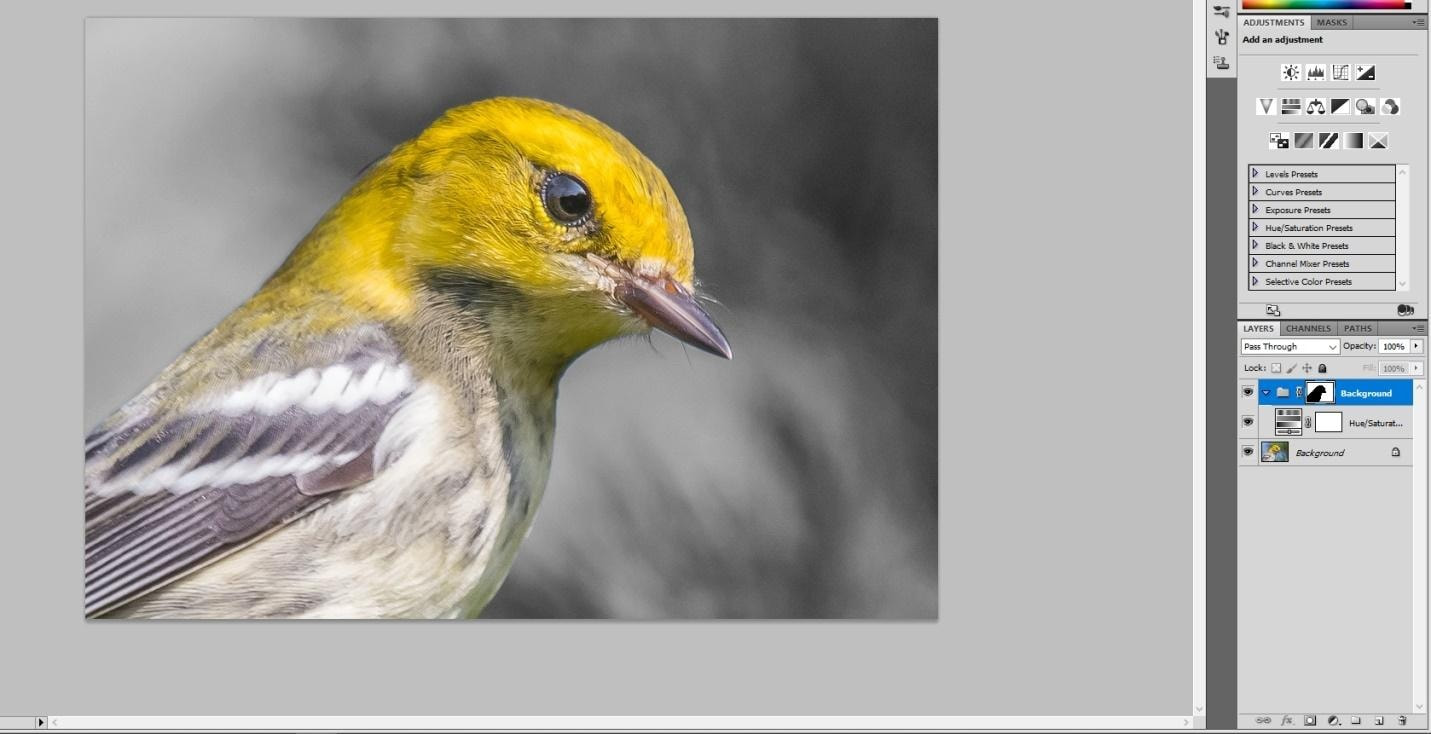 I have changed the hue and saturation here. As I said the effect will be only on the background. Now let’s add one more group and mask for multi masking. Repeat the previous procedure as I am going to add gradient here, that's why I have put its name as gradient. 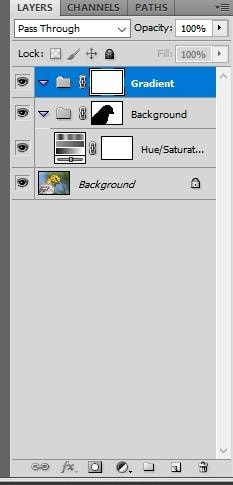 Hit this option from here 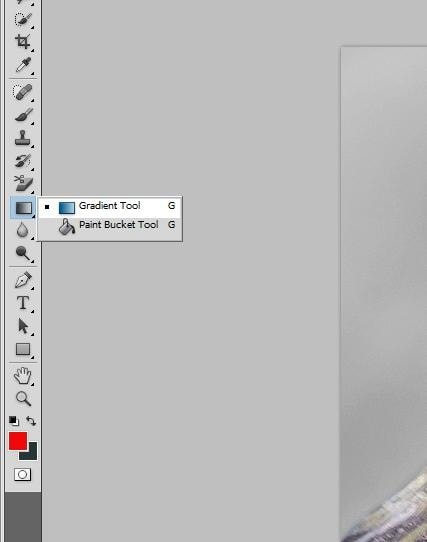 After this step start adding gradient effect by pressing the left mouse and sliding it up or down. But there will be nothing changes in the image as nothing is available inside the mask. To make this gradient option visible move the background group up in this way. 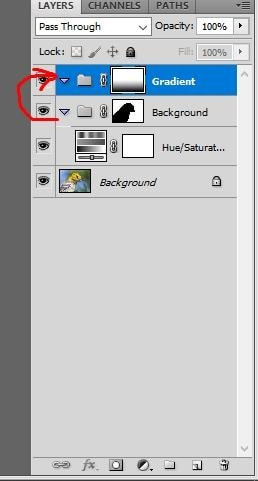 Then the gradient effect will become noticeable. 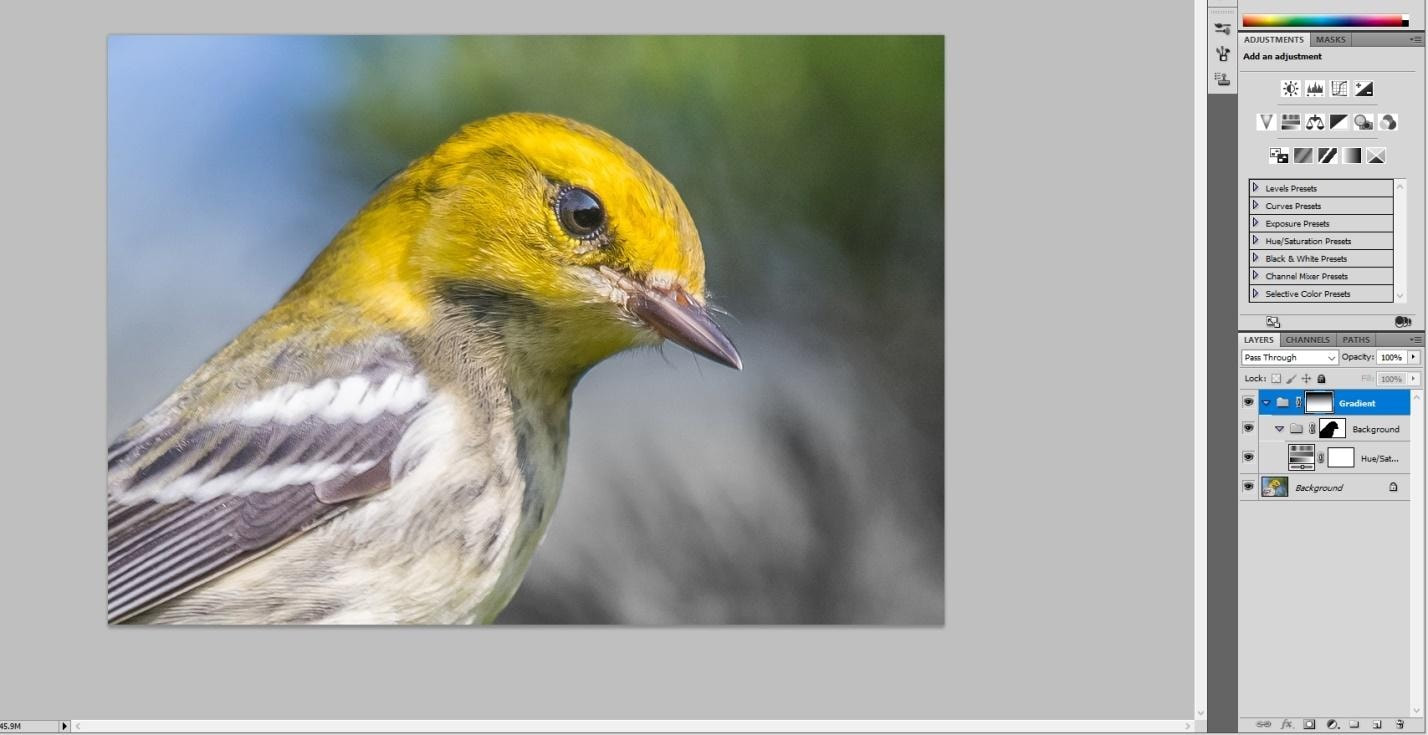 By repeating the above process you can apply more technique by applying different group.
That was the procedure of doing multi masking in Photoshop. Now, you can have lots of fun via altering image in this technique. Reflection is a nice element to add in product photos. It brings an attractive look in the photo and makes the object more appealing. By using Photoshop, reflection can be created for any type of object. Read this article to know the progression of generating a reflection in Photoshop step by step. There are several ways in Photoshop to create a reflection. In this article, I am introducing you to the easiest way of making a reflection. Start with opening the photo that you are expecting to make reflection.  Then open the free transform mode by pressing CTRL+T. Then you will find an outline around your object. 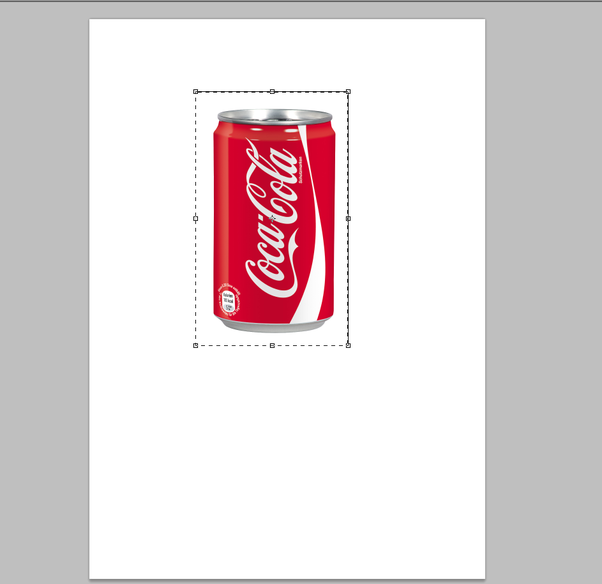 Press on the right button of the mouse you will find a dialogue box like this. 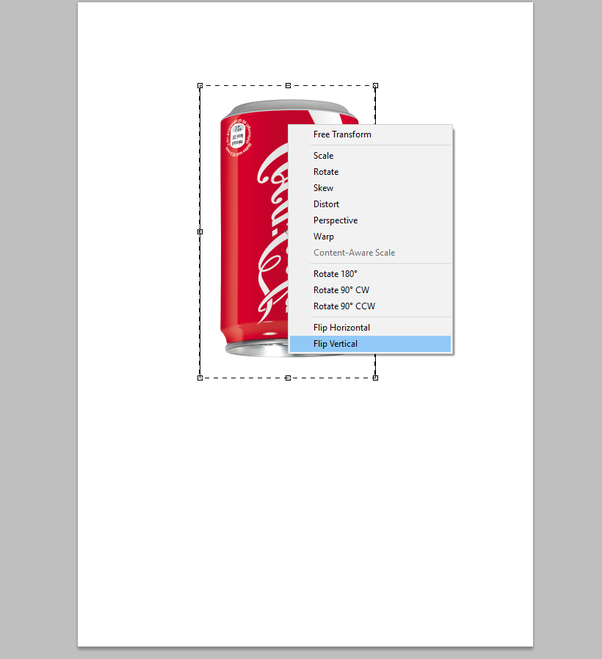 Choose the below option named Flit vertical and your object will flip vertically immediately. 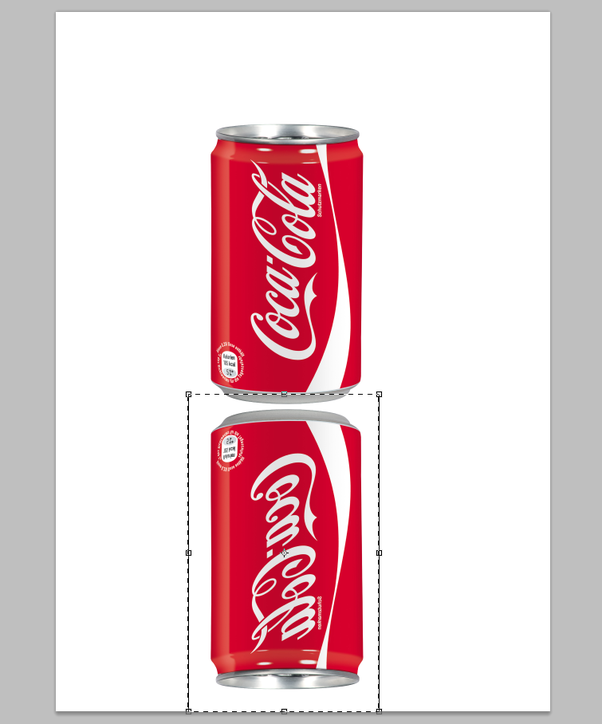 But that is not enough to bring a realistic look. To bring a realistic looks in it, create a new layer by pressing CTRL and J. After taking the new layer select this and go to history brush tool from the history brush option. You will find the option from here. There will be two types of option like History Brush tool and Art history brush tool. You need to choose the first one called History Brush Tool. 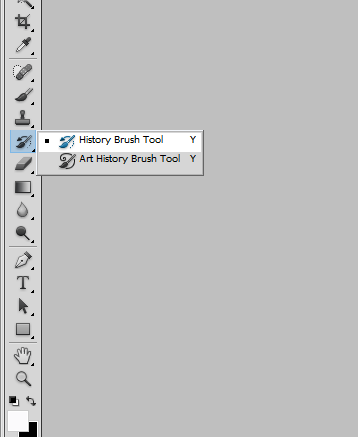 Then increase the brush size and adjust the opacity and hardness according to your requirement. If you are looking for a hard reflection shadow set the history brush opacity low. Set the opacity high when you are asking for a soft shadow. Start from the below side don’t need to change much the upper side of the shadow. 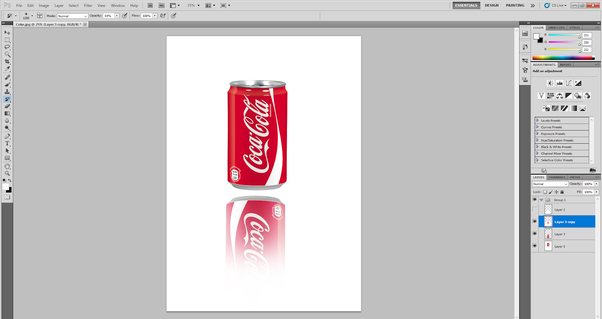 After doing a decent job with the History Brush tool your object will look similar to this. 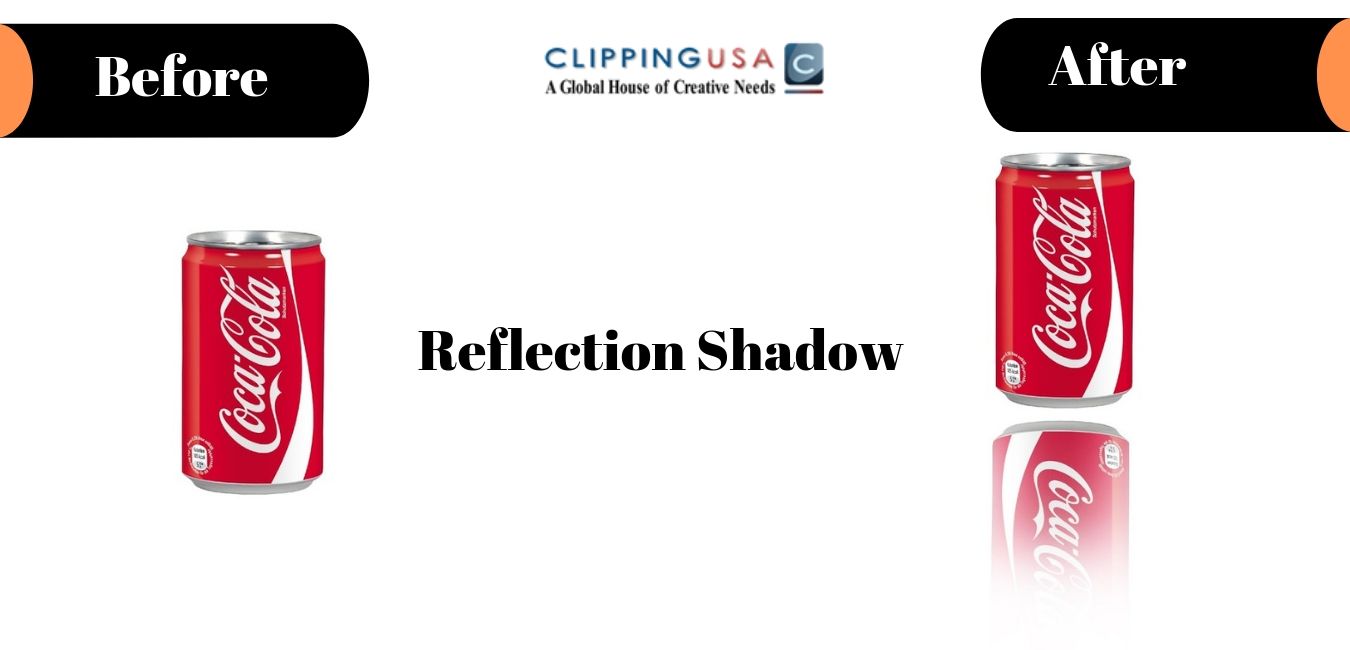 7/19/2019 0 Comments Usages of Photoshop Pen Tool Undoubtedly, Photoshop is one of the most popular photo editing applications. The thing that has made Photoshop so popular is its tools. Pen tool is one of the most important tools those exist in Photoshop. Let’s know about pen tools briefly. 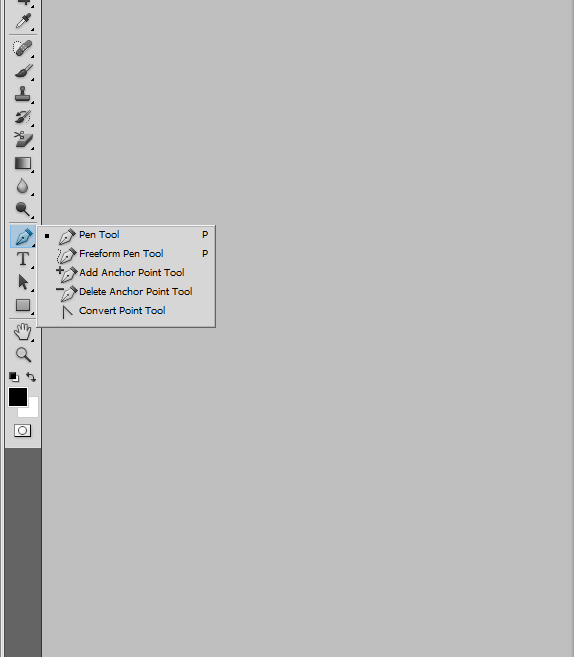 Basically, there are five types of categories for pen tools are available. It works like a vector path. Clipping path technique is applied by using this tool. Via this tool almost all shapes of object can be selected because this tools works with creating paths. It doesn’t matter too much which types of product you are working with. The main thing is you have to create the vector path. Object like books, furniture, products can be performed easily via this tool. Let me show you an example. 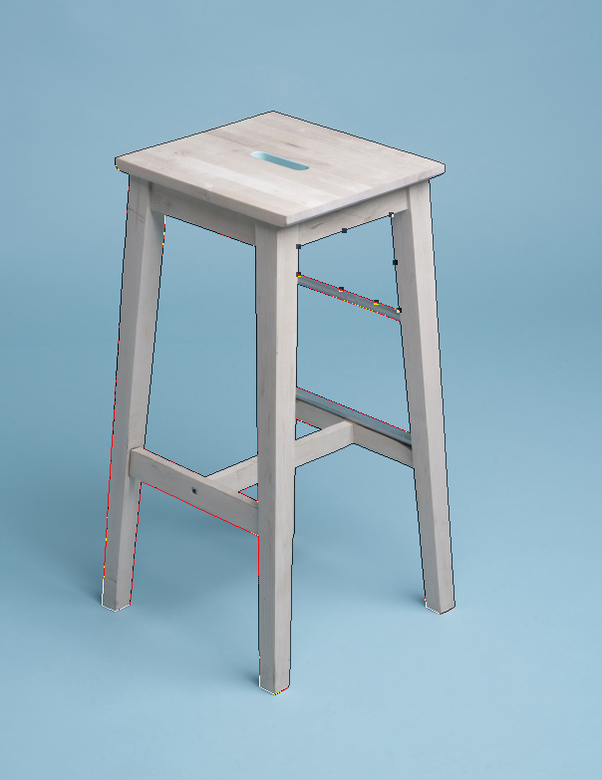 This chair is selected by using Photoshop pen tools. One essential thing is, you need to stop the selection right from where you started. Otherwise, you will not be able to take advantage of this useful tool. If you make any mistakes while making path or accidentally make a wrong path, don’t need to worry. To go back step while making path use CTRL+ALT+Z you will be able to undo every step. After completing the selection to use the selection, you need to select make selection option. To do so, click one the right button of the mouse and choose make selection. 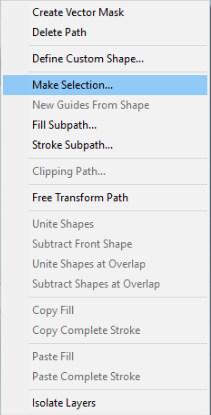 After clicking on make selection a new dialogue box will appear. 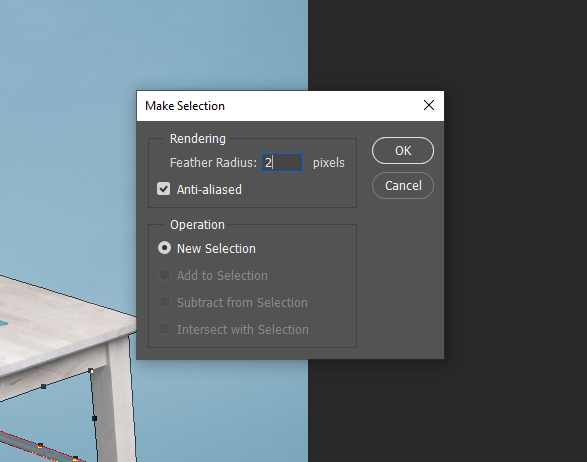 Feather number actually fixes the edges of the boundary line that you have selected so far. In case of hard edges, reduce the feather number to get a smooth result.
For soft edges, you can set the value of the feather into 2 or 3 to get a better result. This tools used for making selection, selecting small portion or whole object etc. The best way to utilize the pen is to zoom in the picture into 300 pixels. The more paths you create the more accurate result it will provide. Another important thing is to, working with small portion and approach with paths of small length. It will give you a better experience while making selection. At this point, you know all of the basic things about Photoshop pen tool. Now, it depends on you how well you can execute it in your practical image editing. By applying the tips and tricks provided above I wish you will have a better experience while utilizing the tool. 7/15/2019 0 Comments how to use curves in PhotoshopVery few tools in Photoshop are as powerful as curves. Despite of that, some of the editors are frightened about it. Are you one of them? In this article, I am going to show you 5 essential ways about curves that will make your Editing experience better than it was before. Let’s get started. 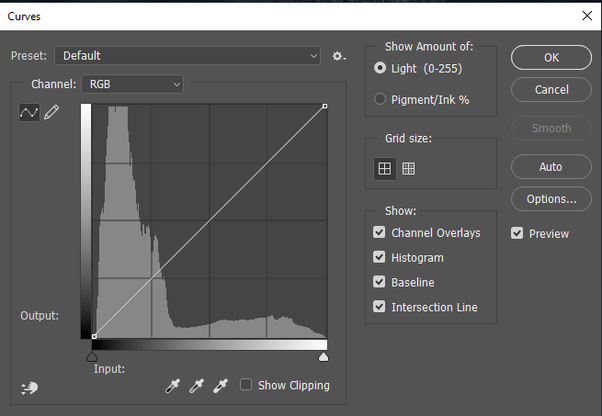 If you want to adjust tones, brightness, darkness and contrast of your photo, anything else can’t be essential than curves. The reason behind avoiding this tool for some people is that they found it difficult to use. To be honest, it is a little tough to deal with the Curves tool specifically for the beginners. But once you get to grips with it, things will be much more comfortable for you. If you are a beginner, don’t need to be tensed anymore. You are going to know easy and effective technique that will help you to make adjustment with the Curves tool. The most amazing thing about this tool is its versatility. It doesn’t matter too much what kinds of action you are going to perform. Are you willing for turning a dark scene into lighting? Or play with the contrast and the color. Curve is able to complete all of your tasks. Allow me to jump to the 5 tricks that will help you to dominate the art of curves quite comfortably. 1. Use Curves from Adjustment Layer Applying curves in Adjustment layer is a good option. In this way, your main image remains untouched. Whenever you are not happy with the adjustment layer delete it and go back to your original image. To apply curves in adjustment layer click on the adjustment icon from the layer option and choose curves. 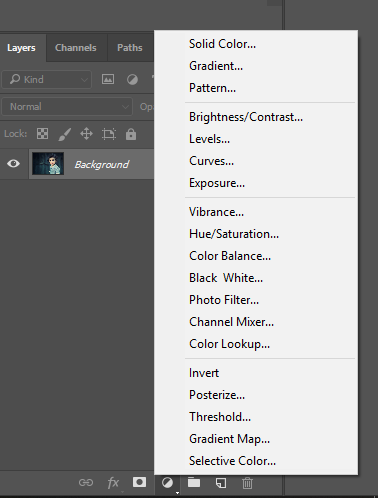 Then choose curves from the list. Then you will find your layer panel will look like this. 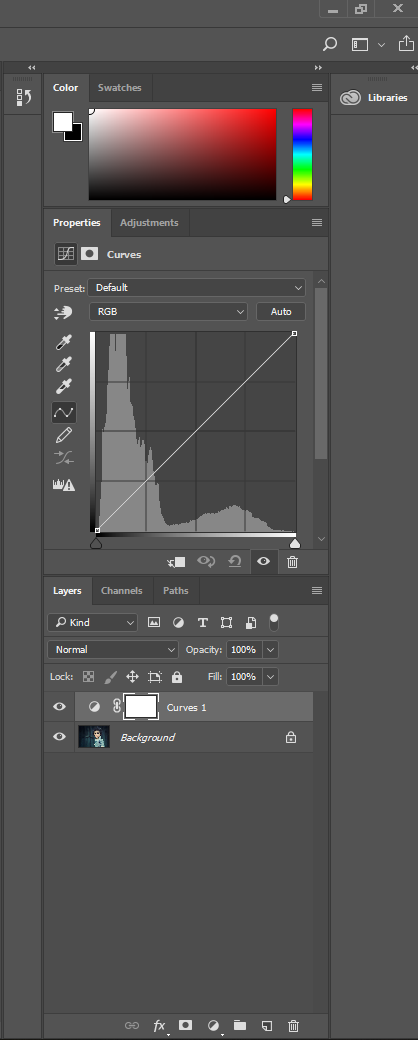 This is a non-destructive way of using this tool. 2. Use “S” technique Make your curves like the ‘S’ shape to fix your color and saturation in a hurry. That will not be so accurate but for beginners it will give some flexibility and make your experiment by making S in different types like making the curve more bend. Try it by bending just a little or you can also bend the curve line to much. But bending too much will not be a smart option in most of the case. 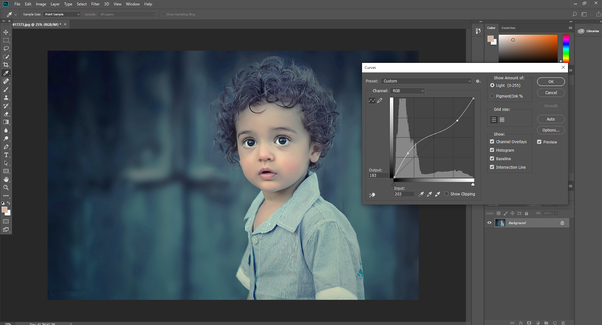 3. Lightening the image To lightening the image spread the curves line from the below section the way it is showing in the picture. 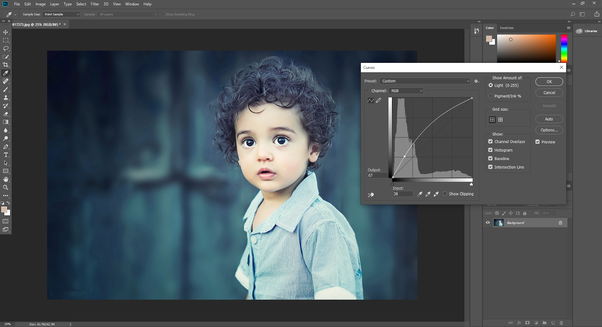 In this way, you can make your image lighten that was taken on a poor light. Spreading the line in the upper side will make your picture brighter. But don’t raise the line too high otherwise it can cause to bring a burn look in your photo. 4. Working on Specific Color You can work specifically on Red, Green and Blue Color by changing them from channel option. Working with these colors specifically you can bring a warm and cool effect in your photo. 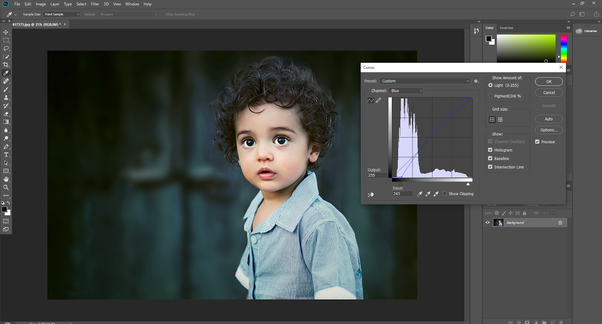 Also change from the bright and darkness from the below. By adjusting red, green and blue you can add lots of effect in your photo. 5. Make the image darkening Sometimes we took photo in extremely high light and photo looks burned. With the help of the curves technique you can make your image dark immediately. To make the image dark, raise the line from the above graph. 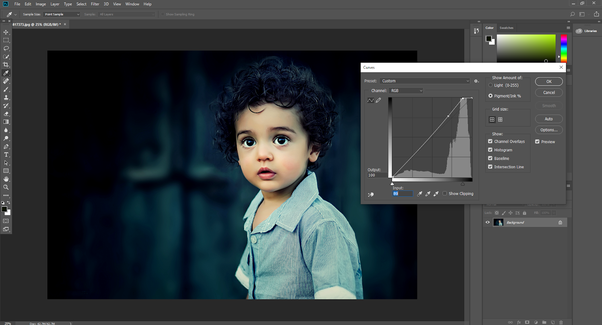 Brightness and shadow can also be adjusted from the below adjustable line. When you move the white point from the white section into the right side photo will get brighter. If you do the opposite things, your photo becomes dark.
From now on, you will be able to use curves conveniently. I wish curve is not difficult feature to use for you anymore. Are you searching for wedding Photo retouching service? Clipping USA is the perfect place in this regard. We can retouch your wedding photo professionally in a quick turnaround maintaining high quality. Allow me to describe it briefly. Wedding is a memorable moment in our life. All of us like to make this moment evergreen with photography. Does an expensive DSLR well enough to provide perfect images? Obviously, it’s not. There are so many things you cannot control like fuzzy light, the vivid face of the bride etc. 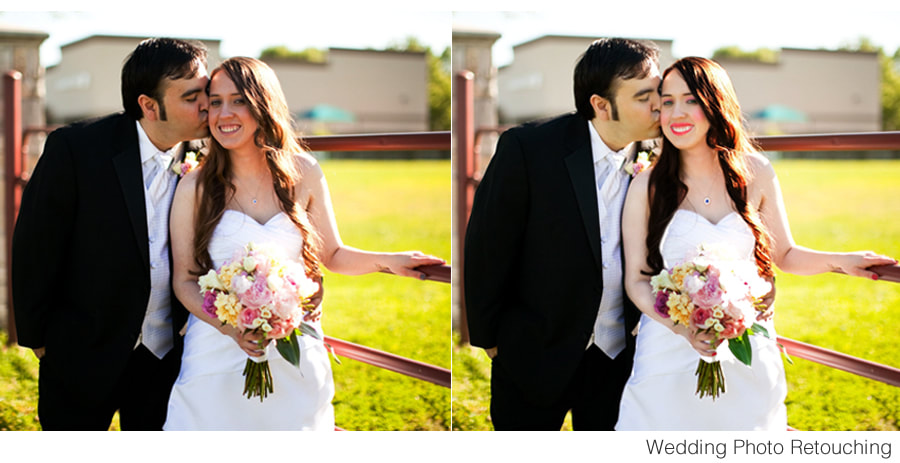 The thing that you can do is send your picture to us and we will prepare your photos to make a perfect Wedding photo Album. Clipping USA is always available to help you by providing high-quality wedding photo editing services. We will execute our creativity and experience in Photoshop to look at your photo authentic. Benefits that you earn from Clipping USA:
You can justify us with a free trial right now. It is totally free.
Image editing is an art and to be an artist of image editing there is no way without retouching the image. While capturing photos, there are so many things and facts in photos that we don’t like. By applying Image retouching one can fix the error in a photo like low light, unwanted marks, dark spots, access, Age spot etc. 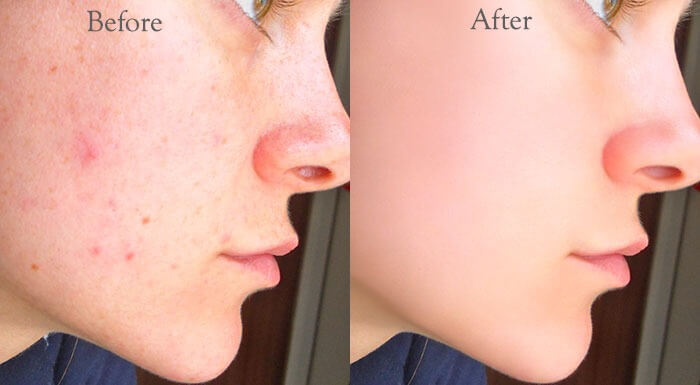 Image retouching can bring an appealing look in any photo. This technique is sufficient enough to make an ordinary image extraordinary. But are you thinking about which types of object are preferred for these kinds of service? This is especially applicable for Modeling photo and products photos like jewellery or mechanical parts etc. This is an advanced image altering technique. One needs to work with professionally hand to perform this. Accurate use of Photoshop tools and color is needed. As it connected with tools and colors, any kinds of automatic software cannot provide sufficient results for Image retouching what so ever. There is no other way without doing it manually. But lots of people don’t have enough knowledge of retouching. Moreover, photographer and business owner doesn’t get enough time to alter photos. That’s taking service from professional image retouching service provider is a good option. Clipping USA is my recommendation as you can get high quality at an affordable price from CUSA. To judge their quality you can place a free trial now.
They are delivering image retouching service from 2014. They are vastly experienced in this field. To place an order directly choose Request for a quote. Background is an interesting fact for any picture. Sometimes it makes any boring Object interesting, sometimes do the opposite thing. People who are connected with online business, Photography, Modeling, Catalogue design, Product advertisements and other image related field, they need to be extra careful about background. Background remove is such a technique that can remove all of your tensions about background. In this technique, one can remove background from photo and make the object easy to focus. This is a proven technique to grab the viewer's attention. Especially, this is a must applicable service for E-commerce business. This is a great way to display product. This image altering technique can present the same object in much more attractive way. 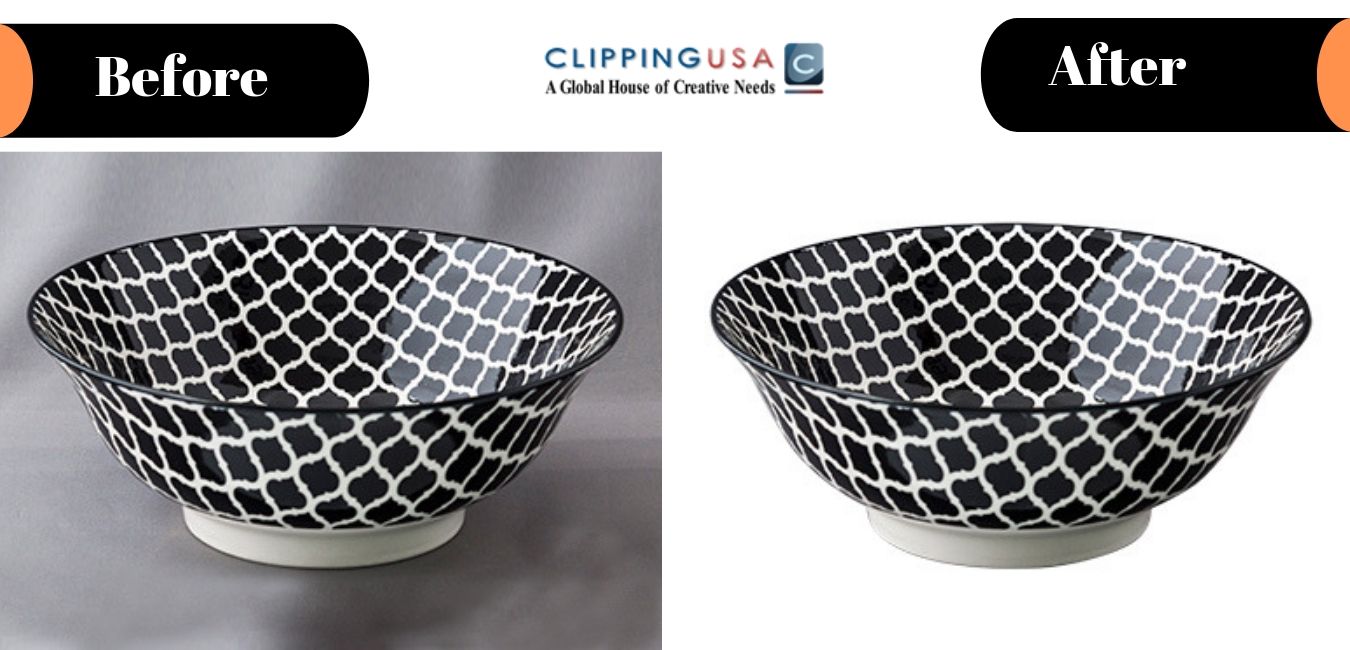 Look at those pictures. If I tell to purchase one of them, which one would you pick? Obviously all of us will choose the Right one. That’s the main specialty of remove background from photo. The similar object looks so attractive without the background. Our subconscious mind is functioned in this way. Humans get attracted to the object that catches his attention. Literally, you will be able to catch the attention of the viewers.
There is a massive chance to increase your conversion rate. People say that, one photo says more than a thousand words but in this technique you can enable your picture to say much more than that! I think if you have not tried it before you should try it right now. The sooner you take the decision the better for you and your business. But how you can get this service? There are several service providers available. To get the best service at an affordable price you should choose Clipping USA. To check their quality take a free trial now. We all know the importance of clipping path when it is about Amazon FBA Business. In this post, I am going to share with you some tips that can help you to grow your FBA Business.  Let’s go to deep without any more delay:
Zoom In Properly Without zoom in the picture, one cannot produce a perfect clipping path. So, my first tip is going to deep of your object. If you don’t zoom in the picture properly, there will be lost of edges after completing the selection. Consider this as your private task. Select with small Line Many people do hurry while creating path and perform with long line. That's why they need to regret later. To make it with the perfection one need to proceed with small line. Otherwise there is no way without regretting and start it again from the beginning. Starting from below Some editor starts selecting from the upper side, corner side or middle side. But none of these are the right way to approach at all. The best way to start creating path is the down side of the object. If you start from the down side, things become comfortable. Moreover, starting from the middle point can because you lose perfect shape. Keep File in PNG After performing your work, you should keep it in PNG. Don’t make the mistake to keep it in JPEG. The first thing is JPG doesn’t support transparent background. One the other hand with the PNG file format you can work with it later. One can also change the background anytime, when the file format in PNG. So, you should save it in PNG file type. If you want white background you can keep it in JPG but also keep a copy of PNG. So you can use it later when you need.  Who wouldn't like to be a successful photographer? The greater part of the general population imagine that it is too difficult to even think about becoming a successful photographer. All things considered, it is significantly simpler than you might suspect. In any case, one has to know around eight key standards. Would you like to know those standards? How about we make plunge forward.
|
 RSS Feed
